As wedding planning has continued, all of you wonderful bloggers keep stretching my imagination to what can be DIY'd and make my day more special and unique (details and my personality are best friends). I ran across this wonderful blogger's blog and this post about bathroom baskets! I might have to steal this idea...it's so freakin cute!
Check it out!
Showing posts with label DIY. Show all posts
Showing posts with label DIY. Show all posts
Monday, March 22
Friday, February 26
Craft Week Day Three: Invitations
This post is one of my favorites. I love our invitations. My MIL generously has provided the paper, along with cutting, putting together and the majority of the stamping. Here are some of the papers:

We did this really cool embossing on the front and side flap. Imagine a beautiful sheer pink ribbon holding it together with a scripty "k"...I will have photos later, it looks really cool, just trust me.

It's raised. Recognize the image?

Open invite. The actual invitation will go in the middle. You can see here where the two pieces fit together, but it will be covered by the white piece of paper that will have the information on it.

All open, just another angle.

This is my job. After she has assembled them all I have to stamp (see, I told you that you would see this stamp later!)

This is the pocket that the RSVP will go in, along with the directions and where we're registered.

Naked pocket flap.

Beautiful stamped flap.

The complete stack, I do not have a photo of because I am not done with them. But I am so excited for these, I think that they look great and I cannot tell you how thankful I am for my MIL
Thursday, February 25
Craft Week Day Two: Throwing Things
Day Two of Craft week is probably the least exciting thing, but it's a craft that needs to be done and it looks so cute. It's the things that people throw at us after we're pronounced "Mr and Mrs. FI's last name."
It's actually going to be as we're boarding our decorated pontoon boat (We're getting married by a river, and our best man lives five minutes up the river and have offered their pontoon boat for our get-away vehicle and since we're finishing our photos at the park, it saves money so we don't have to rent a fancy car to drive around the block.)
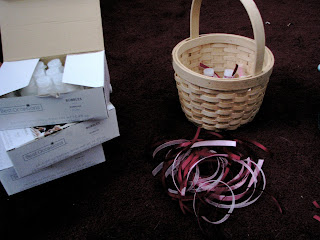
Anyways, first photo of cute bubbles in our flowergirl's unfinished basket (stay tuned for that craft later this week!).


It's actually going to be as we're boarding our decorated pontoon boat (We're getting married by a river, and our best man lives five minutes up the river and have offered their pontoon boat for our get-away vehicle and since we're finishing our photos at the park, it saves money so we don't have to rent a fancy car to drive around the block.)
Anyways, first photo of cute bubbles in our flowergirl's unfinished basket (stay tuned for that craft later this week!).

They are so cute! I bought the ribbon (which looks brown, but it's our beautiful raspberry/purple color) at hobby lobby, the baskets at Meijer, and the bubbles at Walmart.

Close-up. Two pieces in random fabrics (organza and satin) and in random color (pink and sangria). Love.

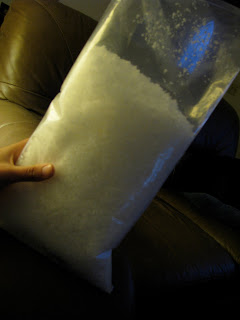
But you didn't think that we were just going to have bubbles, did you? No, we're going to have to have something else. So, we take tulle circles (bought again at hobby lobby) and fill them with eco-friendly confetti.

This stuff is so fluffy and awesome. Love love.


I've done about ten little packages (see next photo) and this is all I've used. It's cheaper than bubbles and way more unique.

These will accompany the bubbles in the flowergirl baskets.

Another photo of both of the colors of programs. I love these, but like I said, they will be the death of me.

Another fun photo of my shoes that I am going to make into lace-up slippers because I couldn't find any plain white lace up ballet slippers under 50 bucks. These were purchased at Meijers for 12.99.

Wednesday, February 24
Craft Week Day One: Programs
This first craft is my longest and most tedious. It's going to kill me. Period.
But it's so so so cute.
Firstly,
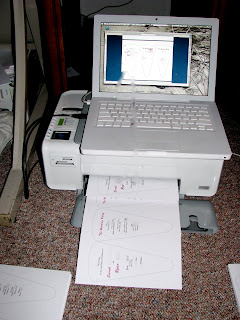
the printing of the programs. I downloaded a template here. I love this template, it's so easy to enter your own information and print.


My wonderful FI modeling the fans. :) These are going to be done in the sangria color too (So at the alter, we'll just see a sea of pink and sangria! I'm going to tell my photographer that I want a photo of this for sure!). The only information that I put on them was the names of our wedding party, along with our pastor, our parents, the ushers and the master and mistress of ceremony. I figured everyone knows how a typical wedding plays out (seating, bride comes down, vows, exchange of rings, ect...) so this information wasn't needed. But I did want to make sure that the people who are directly involved got recognition for all their hard work. Right now, I'm just worried about how long it's going to take me to finish these all, since I have so much. But I have three months, so no big deal, right?
**all paper products and brads used are Stamping Up! products. Visit their website here to find out more about their products and crafts. **
But it's so so so cute.
Firstly,
the printing of the programs. I downloaded a template here. I love this template, it's so easy to enter your own information and print.

For some reason, that step made me super nervous. I had to wait until Ryan got home to make sure that everything looked ok. Here are all my supplies:

Yea!! Now, this step is going to be the one that gets me. I have to cut out 200+ pages of fan templates. Uggh. I figure if I break them up, so I cut 25 each day while watching a movie or something, it won't be so bad. This is also the step that I should employ the help of my BMs...

I layer them with a solid color (wait to see final project to understand) so that way I have half the lines to worry about. After they are cut, I stamp them (look forward to seeing this stamp used a lot...I love it!) with pretty in pink ink (for both colors. The programs will also be in my sangria color, but I just did the sample in pink).

Now that all of them are stamped (assorted number and direction per program, just so that they look more hand-made), stack them up...

Punch a hole and place a brad.


I love these brads. My MIL (who is paying for all the paper supplies bought these and loves them so much, she said that she's going to collect the remaining programs that aren't used and take all the brads out of them..haha.

The finished product. I love love love these.

My wonderful FI modeling the fans. :) These are going to be done in the sangria color too (So at the alter, we'll just see a sea of pink and sangria! I'm going to tell my photographer that I want a photo of this for sure!). The only information that I put on them was the names of our wedding party, along with our pastor, our parents, the ushers and the master and mistress of ceremony. I figured everyone knows how a typical wedding plays out (seating, bride comes down, vows, exchange of rings, ect...) so this information wasn't needed. But I did want to make sure that the people who are directly involved got recognition for all their hard work. Right now, I'm just worried about how long it's going to take me to finish these all, since I have so much. But I have three months, so no big deal, right?
**all paper products and brads used are Stamping Up! products. Visit their website here to find out more about their products and crafts. **
CRAFT WEEK
Hello Blogger Friends!
It's craft week! (kinda...since it's already Wednesday, it will be a half week)
Most of the DIY projects I haven't started on. And this week, I am house-sitting. PERFECT!
I will be photo updating you all starting tonight, so stay tuned. There is lots of fun to come!!

It's craft week! (kinda...since it's already Wednesday, it will be a half week)
Most of the DIY projects I haven't started on. And this week, I am house-sitting. PERFECT!
I will be photo updating you all starting tonight, so stay tuned. There is lots of fun to come!!